Category Archives: DIY

Patio Garden

So if you were raised a country kid like me, apartment living in the city can be absolutely unbearable. When you’re use to fresh garden vegetables, supermarket produce sucks.

If you’re lucky enough to get a ground level apartment, most of them have some sort of little concrete slab they call a patio.

This summer Matt and I had our first patio garden, and it’s been AWESOME! I mooched 5 flower pots from mom and dad, some small wooden posts, and some hog wire.

We decided to do Green Peppers, Cherries Tomatoes, Chives, Basil, and Sugar Snap Peas.

Fairly early on. The snap peas had been up for about a week, and the basil and chives had just sprouted

Fairly early on. The snap peas had been up for about a week, and the basil and chives had just sprouted

Tip: drop a couple big-ish slabs of rock into the bottom of each pot to help with draining.

Plant according to seed packet. Vine plants, like snap peas need something to climb, which is where the posts and hog wire come into play. (See Picture)

We had an 80% success rate! The peppers did fantastic. The first pepper we got was eaten by chipmunks, the dirty rat bastards. But then we got 2 enormous peppers! These things were huge, especially for container plants. I made some awesome stuffed peppers with them, and thought the plant was pretty much done. However, with this weird weather the plant rebloomed and is totally full of peppers right now! IN MID-SEPTEMBER!

Peppers!

Peppers!

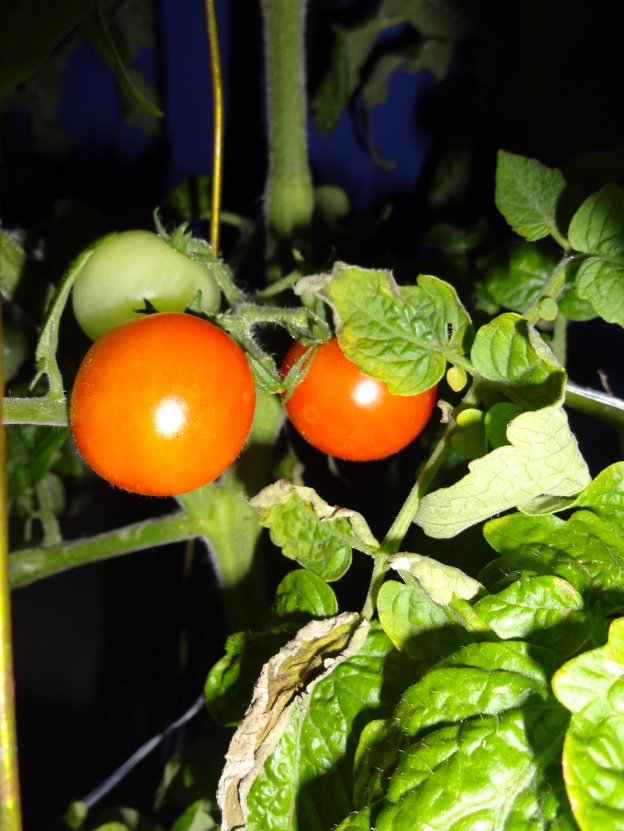
The tomato plant. Oh the tomato plant. Where to even begin. Firstly, it got enormous and couldn’t hold itself up, completely top heavy. So I started with a couple stakes (and by stakes, remember I’m poor and cheap, I mean wire clothes hangers that I bent to work), when it outgrew my stakes, I would up with a super janky rigging. First, I’d like to point out that the landscapers at our building broke one of our branches, which we tied back up and luckily it healed. Storms blew it down. The dog knocked it down. Matt broke a branch by accident, but this thing WON’T DIE. I incorporated the lawn chair, the pot of chives that were, at the time, a complete failure, to anchor it, and various wiring. It’s still alive and producing lots of tomatoes!

DSC01152 DSC01197

My janky rigging haha

My janky rigging haha

The chives….. sucked. But in the end we wound up with a handful of them, so it wasn’t a total loss.

The basil was awesome! It exploded. This plant just took off and we were using basil in every meal. It was fantastic!

(Tip: you can dry basil in the microwave. Put a large handful between 2 paper towels and microwave 30 sec at a time until completely dry. Crush and store.)

Not a great picture, but you can see the peas in the back there

Not a great picture, but you can see the peas in the back there

The snap peas were a little bit of a disappointment. They started great, grew huge, lots of blossoms…. and then it got a fungus that a lot of viney plants get and died 😦

I’ll post the recipe for the stuffed peppers later. Happy gardening!

Yummy Stuffed Peppers :)

Yummy Stuffed Peppers 🙂

Frosted Glass – Cheating

Let’s take frugal to a whole new level. As poor as us college kids are, we somehow always manage to scrounge up a few bucks for a bottle of wine or similar, yeah? yeah….

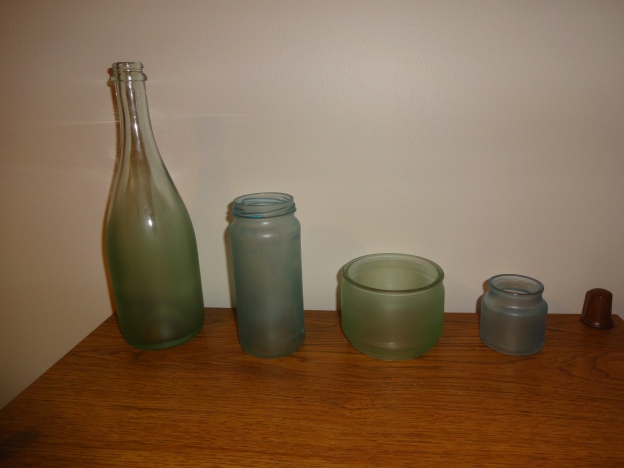
So lets take our now empty glass bottles and make them frosted! Cheap decoration for a small apartment or dorm room, and no one could guess how you did it either.

Hopefully the label of your bottle comes of easily and clean. Otherwise either soak it in hot soapy water or water+baking soda. Label should be fairly easy to remove then.

When your bottle is clean and dry, find yourself some Elmer’s Glue. Yup. Elmer’s Glue. Also, you’ll need food coloring, and disposable container (I used an empty gum container, how cheap am I? haha) and a foam paint brush.

All you need!

All you need!

This is so incredibly easy its seems so stupid that I haven’t been doing this for years.

003

Dump maybe 1/4 c of glue in your container and add 2-3 drops of food coloring of your choice. Mix well.

Apply the colored glue as even as you can manage to your glass.

All glued.. er.. painted up!

All glued.. er.. painted up!

Allow to set until all the glue is completely dry. You’ll notice its now complete uniform! (In order to get this effect, be careful not to leave thick streaks anywhere, spread that stuff around!)

Almost there!

Almost there!

There you have it! DIY Frosted Glass Decor!

006

DIY Curtains

I’m kind of a sucker for colorful curtains that makes the light colorful when it comes through. I was also getting really tired of the ugly generic plastic blinds that came with my apartment. SO: diy time. Yay!

Went to Walmart and picked out some cheap fabric. If you can’t already tell, I kinda love the color green, and I wanted something that would throw a good color in the light. So I went with a light green with white plaid. (This would be the same fabric I used for my To-Do board)

010

What fun is crafting without a mimosa?? 

I have a rather wide window, which worked out perfect. If you have a window wide enough to use to 2 panels of curtains, then you can get 4 yrds, cut it in half, and just keep the finished edges so you don’t have to sew up the sides. Makes things MUCH easier.

009

I hemmed the top wide enough to be able to fit my curtain rod through it, and hemmed the bottom about 3/4″. I bought the curtain rod at Walmart for $1.29 That’s it! 2 quick runs on each panel and BAM. Curtains.

011

To-Do Board

So I am the queen or organizing. I cannot function without having sticky notes, a checklist, prioritized bullets… the works. It’s the only way I get anything done. Seriously, you oughtta see my desk at work. Post-It notes EVERYWHERE.

My big thing is to-do lists. I’m very forgetful and rather unproductive on my days off so I have to make myself a to-do list to keep me on track. Here’s a way to decorate and organize at the same time:

022

So super simple.

Here is what you’ll need:

025

024 023

I used left over fabric from the curtains I made and covered the cardboard backing that came with the frame. Use Elmer’s Glue to hold in place. Didn’t need anything too sturdy since it was going in a frame anyways.

027

There it is! Easy Squeezy. Dry Erase markers write and erase just fine on glass.

And of course, I can’t help but show off Johnny, Elvis, and the Beatles 🙂

Not to mention I was playing around with the panoramic setting on my camera
029

DIY Fix a Broken Zipper on Your Favorite Jeans

It’s happened to all of us. Great pair of pants, broken zipper. Nooooooooo!!!!!!!

033034

I decided, no more! I will fix this! I found a tutorial online that gave me the round about idea and then I just wung it. You’ll notice I do that a lot…

Here’s what you’ll need to fix your pair of jeans:

035

Some wide ribbon, 7/8″ works well

Matching thread

Medium sized buttons

Scissors

Pins (optional)

First cut out the broken zipper using a thread ripper or scissors. Then cut a piece of ribbon that is twice as long as the flap of your jeans. Double it over and pin it on the inside of the top flap.

036 037

Sew the ribbon to the jeans across the top, bottom, and the inside (the side closest to pocket). For the side closets to the edge of the flap, do not sew it to the jeans, but just sew the two layers of ribbon together.

038      039

So now you have a pretty little ribbon on the inside of the flap that’s hidden.

041 Next, sew your button holes.

Now, this is the way I did it because I did not have a machine. Had I had my sewing machine, I would’ve sewn the button holes first, then sewn the ribbon into the jeans. Trust me, it is VERY irritating to sew button holes by hand… But hey, it worked.

042  Cut your button holes!

Since I did mine by hand, without a machine, I didn’t trust the integrity of my handy work. So I also applied fabric glue around the hole to reinforce it.

 047

Mark where you want your buttons on the bottom flap and sew into place.

 046 

And VOILA! There you have it, your favorite jeans are back in business!

049

Origami Owl Living Lockets

So some of you may have seen my post a couple weeks ago about the Origami Owl Lockets? Well I’m super excited because I got mine in the mail yesterday and I LOVE it!

005 007

Aren’t they awesome?!?!!

If you didn’t see my post before, here’s the scoop on these awesome little gems:

My sister, Amanda, just joined this amazing company called Origami Owl. It was started by a 14 year old girl, who started her own business to save money for a car. Well her business exploded (in a good way) and now here it is!

Amanda is an independent designer for Origami Owl. She’ll help you design and customize jewelry that is reflective of your life and personality and all the things you love. These lockets are AWESOME! If you’re not into the locket style, there’s also a tag collection as well.

The lockets are offered in silver, gold, and rose gold, and there are SOOOOOO many ways they can be customized. They have something for everyone.

I chose a silver locket and chain, with a rose gold plate that says “Believe” and a smaller silver plate that says “Love”. These describe how I want to live my life.

Given the name of my blog, the 4-leaf clover and the “Good Luck” tag are obvious. Music is a HUGE part of my life, hence the eighth notes. And playing pool has become a pretty strong bond between Matt and I, so the eight ball kind of represents our love.

They are beautiful.

If you’re interested, either visit my sister’s website, or check out her facebook page:

www.amandakerns.origamiowl.com

https://www.facebook.com/pages/Origami-Owl-Amanda-Kerns-Independent-Designer/334811569962251

DIY Jewelry Hanging Doohicky

Jewelry Hanging Doohicky

Yes, Jewelry Hanging Doohicky.

I literally sat here for 10 minutes trying to come up with a different name for it and my mind just blanked.

Anyways, this was great. Super easy and CHEAP and quick.

The supplies:

013 014

97 cent curtain rod from Walmart


009015

A main color and subcolor spray paint. (couple bucks each)


016

Decorative Shower Curtain Hooks (about $1 or so)

The first thing I did was spray paint the whole curtain rod with the metallic gold paint.

Then I taped off the design. Had I actually thought this through I would have used yarn or ribbon or painters tape of some kind. I was ill-prepared so I used paper that I had to cut into very thin strips and tape around the curtain rod. Yeah… It was tedious. But hey, it worked!

Tape it off!

Tape it off!

Then spray over your rod again, this time with the main color. In my case, it was gloss black.

Spray it again!

Spray it again!

Let it dry for about 10 minutes or so. You don’t want to wait too long or else you’ll risk peeling the paint when you remove the tape.

018 017


Voila!

Perdy right??

Next I mounted it on the wall in my bathroom. (The curtain rods I bought had mounting hardware included). Then I hung the shower curtain hooks:

020 019


Sorry for the crappy pictures. My camera got sand in the lens during vacation and is jammed, and my phone doesn’t take the best pictures…

Now I was ready for the jewelry!

Jewelry Hanging Doohicky


There you have it! Took no time at all!


Just a Quick Storage Tidbit

This is going to be a super short, quick post, but:

MASON JARS ARE AWESOME. Seriously, you can use them for SO much. They are excellent for storage of cotton balls, Qtips, bobby pins, etc

Store your cotton balls! Much classier looking than a big plastic bag with Kroger stamped across it :)

Store your cotton balls! Much classier looking than a big plastic bag with Kroger stamped across it 🙂

Mason jars are also great decoration. I found several things I’m going to try on pinterest, hand scrubbed and hot chocolate mixes… and if you package these DIY gifts up in a mason jar you get that cute rustic country look too!

I went on vacation with Matt and his family this winter to Panama City Beach. I saved some sand and shells and kept them in this mason jar for some bathroom decor:

I know the writing on the Jar kinda sucks. It looked different before the paint dried, but oh well :)

I know the writing on the Jar kinda sucks. It looked different before the paint dried, but oh well 🙂

Also, the flowers and vase? I have 2 sets of those in my bathroom. Super cute. Walmart! The vases were like $3 each and the sets of flowers were 94 cents each. AWESOME AND CHEAP!

Quick and Easy Closet Organizing

So, it seems like no matter how clean the rest of my apartment it, my closet it ALWAYS trashed. And if I do manage to get it straightened up, it gets destroyed in no time.

I don’t know about you, but it seems like the source of most of the mess is usually the stuff that gets rummaged through, like scarves, hats, belts, etc.

So super easy, scarves are all in one place:

Photo0500


Easy squeezy. Took like 2 minutes to round up all my scarves and loop them through themselves.

As for belts:

Photo0497


That’s right, those are paper clips. In all the apartments I’ve lived in they all have had pretty decent sized closets, but the instead of having a rod to hang stuff on, it’s always been these wire framed white metal shelf thingys…. sorry… terrible description. But you can kind of see what I mean from the pictures. Anywho, a little box of cheap paper clips, clip right onto the shelving, and hang the belt buckles from them.

Cheap and easy, PERFECT for a poor college kid like moi.

Photo0498


The other great thing about this, is if you put the belts and scarves side by side, they kind of create a curtain to block whatever mess you have behind them! Not that I have a mess or anything….

Fairy Dream Jar

So this is an idea I got from Pinterest. By the way, I LOVE Pinterest! Seriously, I could spend hours on there… and I do…

But anyways, my niece’s birthday was coming up and I wanted to do something special. Those kids have EVERYTHING so I couldn’t think of what to buy that would mean something so I wanted to do something she’d remember.

On Pinterest someone had posted glow-in-the-dark mason jars. They were super cute! The poster had simply dotted the inside of a plain smooth mason jar with glow in the dark paint. It. looked. magical!

My niece just turned 6 and she is SUPER into fairies. Obsessed with Tinkerbell. SO I thought it’d be cute to do something along those lines. So for her birthday she got her very own dream fairy.

003

I found several different colors of glow-in-the-dark paint and spent FOREVER putting a bajillion dots on the inside of the jar with a small paint brush. Then as you can see I decorated it up a bit.

I included a note from her fairy, explaining the dream jar and how it worked. Long story short, she had her very own fairy who looked after her. She would keep her magic jar on her window sill where all day long it would absorb sunlight. Before she went to bed each night, she would write on a piece of “dream paper” what she wanted to dream about that night. When she turns out the lights, the fairy dream jar glows in the dark, showing that her fairy is working her magic and helping her have good dreams.

001 002

This was also great, because it helps her practice her writing!

And of course I had to come up with a cool name for her fairy. After much pondering and debating my mother helped me settle on Starlight.

Easy DIY gift for a little girl!